|
|
Dart Tag BlasterProcess first posted at NerfHavenI'm a total NERF mod n00b myself, but I completely fell in love with my pair of DTGs and decided to dive in. I was daunted at first by the relative lack of good pics of the innards of a DTG, so as I did this first mod blind, I tried to document as much as possible for future modders. 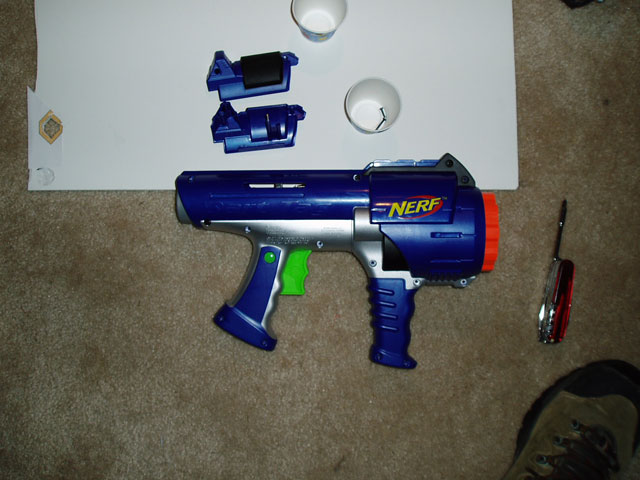 Just to be clear, this is the DTG I'm talking about. At some point I'd like clarification on where the acronym comes from, since all the other Dart TaG blasters seem to have more salient names, and I'd be tempted to use 'DTB' instead. Ce'st la vie. Anyway, step 1. Remove the top grip. 2 deep screws. No problems. 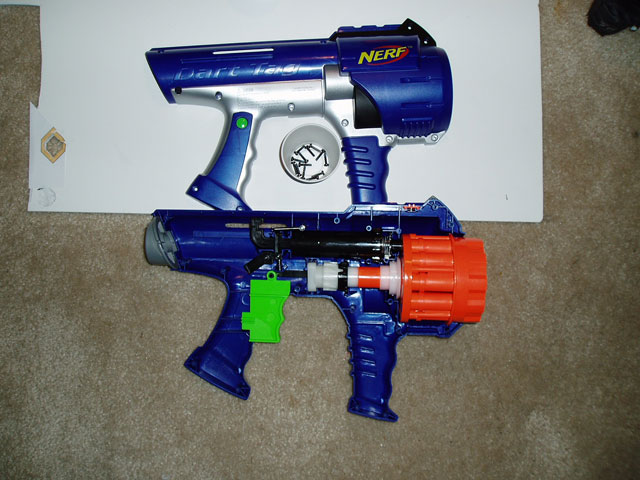 Some 13 screws later, the actual body opens up. 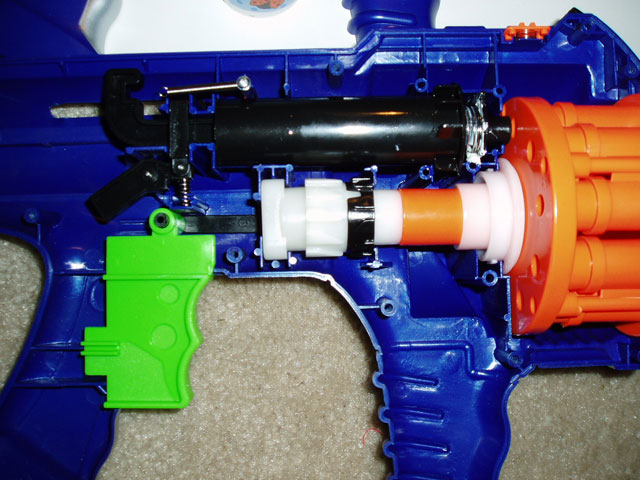 Be very careful not to lose the tiny spring over the trigger. The orange tab and thin spring on the top clip also get lost easily, if you care. 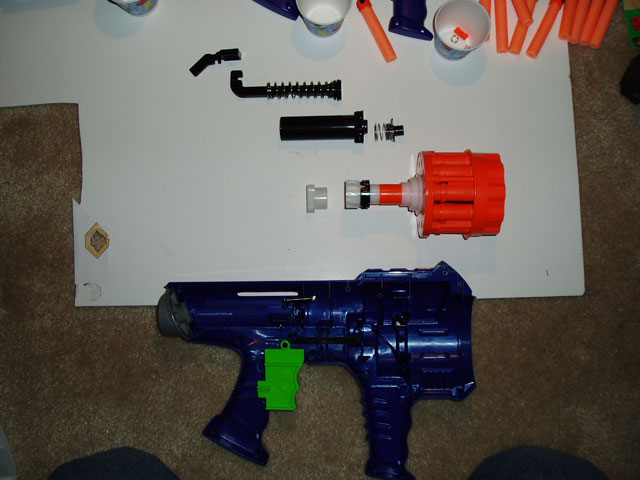 The DTG: exploded view. Hinged trigger piece, piston, spring, piston chamber, springloaded seal, and the barrel assembly. 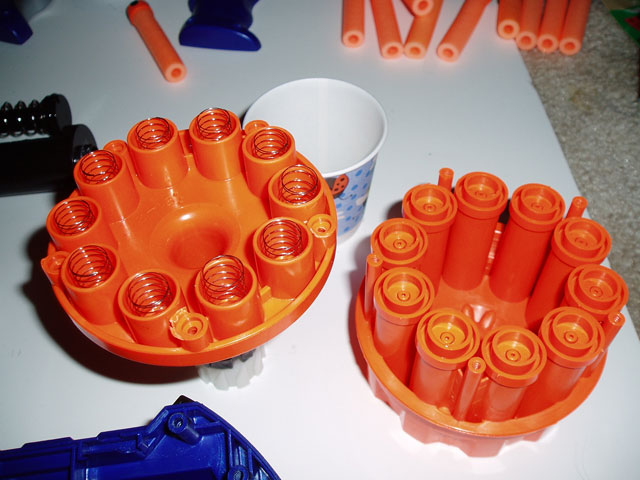 The barrel assembly opens into the usual array of ARs. Careful, those springs will go flying.  I tried to keep the mod reversible, so I removed and held onto the springs and pronged bits before putting the spikes back in. A more aggressive mod would drill out the spikes and really seal the caps back down. 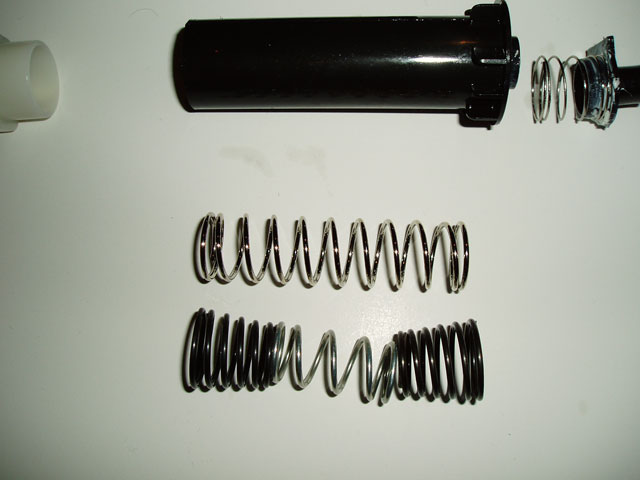 An early attempt at replacing the stock spring with a combination of what I could find in the Lowe's springs department. Unfortunately the amount of solid metal this compressed to kept the piston from latching... 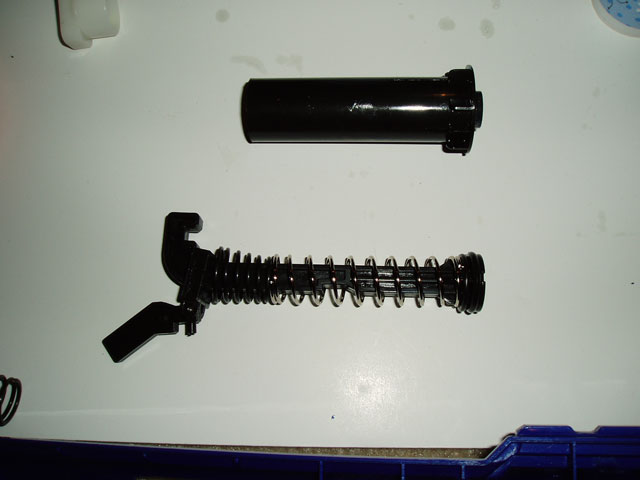 ... so I ultimately just added one of the end springs to the existing spring, which at least puts the whole assembly in slight compression when reassembled, meaning your entire pull stroke stores some energy. 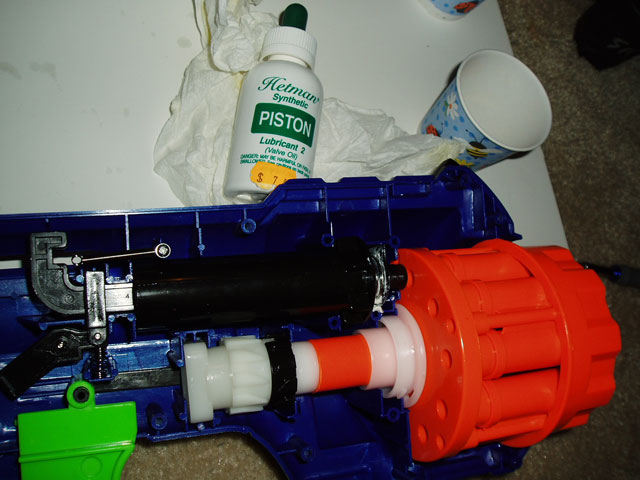 I'm a trumpeter, so after fiddling with the parts rubbed off a good bit of oil, I dropped some synthetic valve oil in to re lube/seal the piston. A more aggressive mod would have likely swapped the O-ring and glued/caulked/foamed the piston back into the gun. 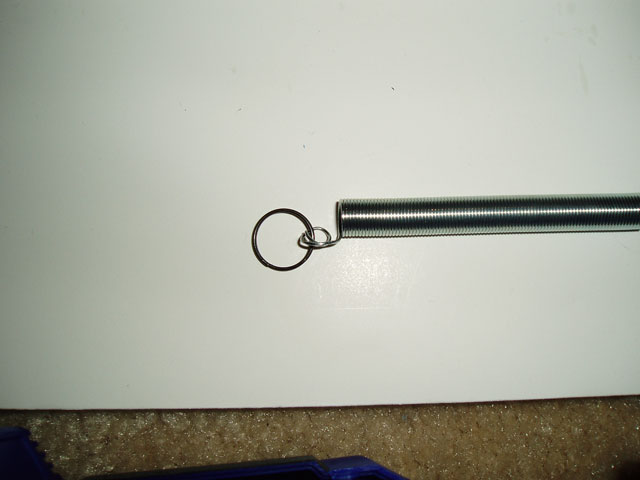 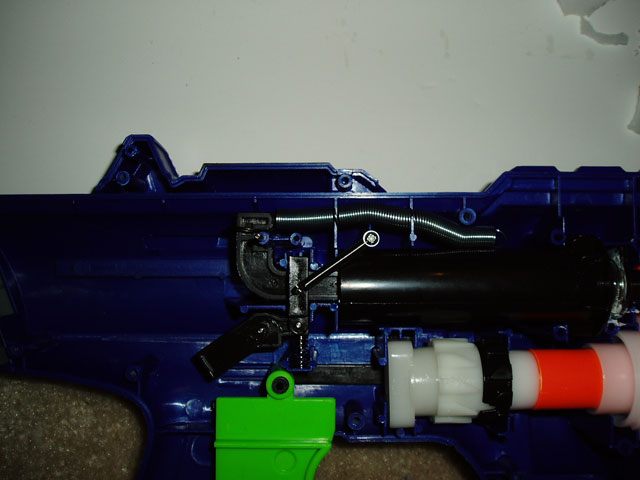 Compression springs seem to be a bitch to come across these days, at least where I live, so I tried to rig a little extra oomph with a small tension spring attached thusly. I reassembled the gun once and had it work, but after taking it apart again for some other cleanup, I wasn't able to reproduce just the right geometry to have it not snag on anything or pop off the piston. Ultimately, I gave up on this approach. 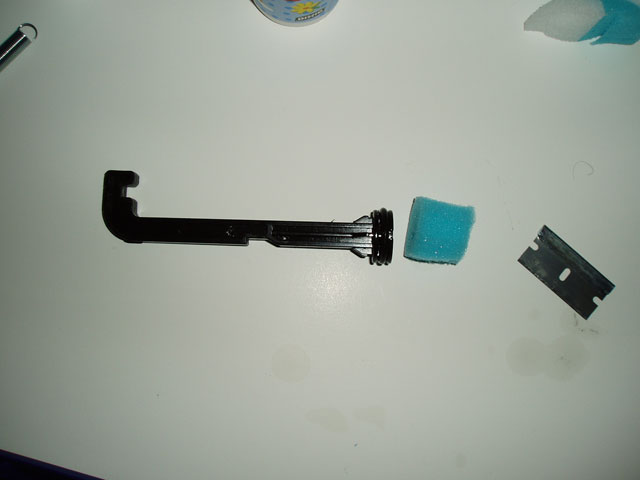 Now, I get kinda paranoid when I dry-fire and hear all the plastic-shattering acoustic energy resonate through the gun, so I made a quick attempt at padding the piston with a chunk of beauty sponge from CVS ($2). 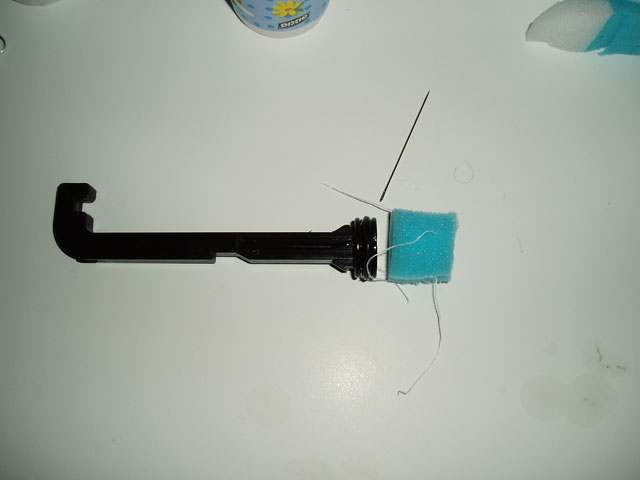 Just thread it with whatever thin string you have... 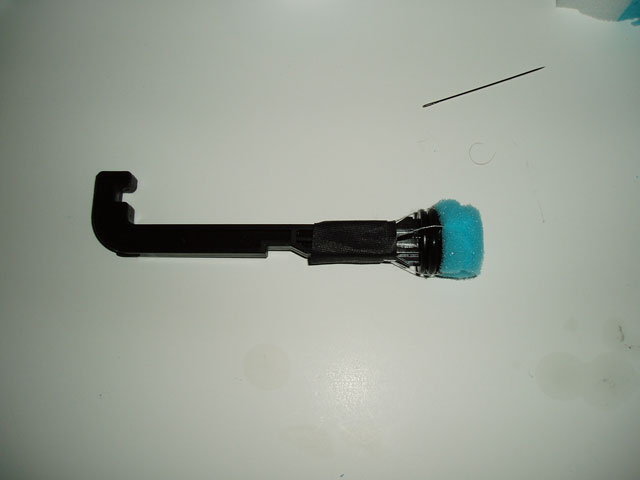 tape the string back against the piston shaft... 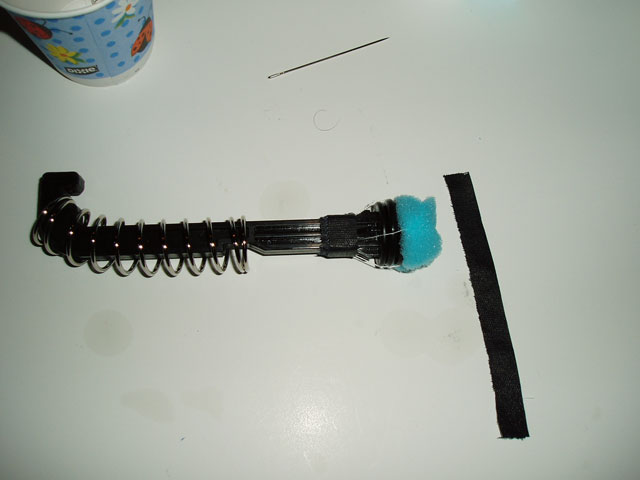 and trim the tape down so it doesn't interfere with the firing mechanism. The pad takes up some space, particularly until you fire with it a few times, and thereby cuts into your range, but it does make the noise a little less nerve-wracking. When you reassemble, it is VERY easy to strip out the screw holes. I'd recommend dropping each screw in its hole, backing it counterclockwise a few times to feel where it 'clicks,' and then screwing it in from right after the click. If you feel any resistance, you're probably chewing up the plastic. Final range is still better than stock by about 20-25%. I have no good measured testing range, and quoting exact distances assumes certain firing conditions, so meh. Just expect a little more oomph beyond what you would normally get with the stock gun. Not impressive, but a decent payoff for a first-time mod. |